
Using Groups To Assign Members
Operto Connect introduces an innovative Groups feature, designed to streamline the way businesses manage access and visibility of units and reservations for their team members. This feature is especially beneficial for larger clients who require a simplified experience in managing their units and team members efficiently.
How to Use Groups
Groups in Operto Connect enable you to associate multiple units with a specific group and then assign related members to this group. This process not only simplifies management but also ensures that team members have the necessary access and visibility.
Creating a Group
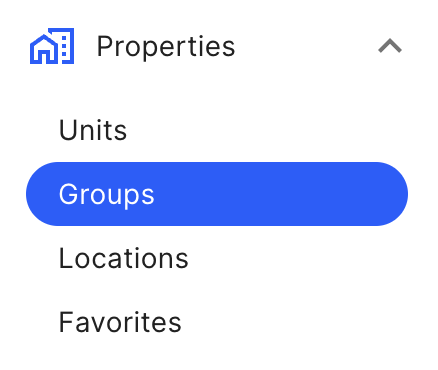
- From the left panel, select Properties and then Groups.
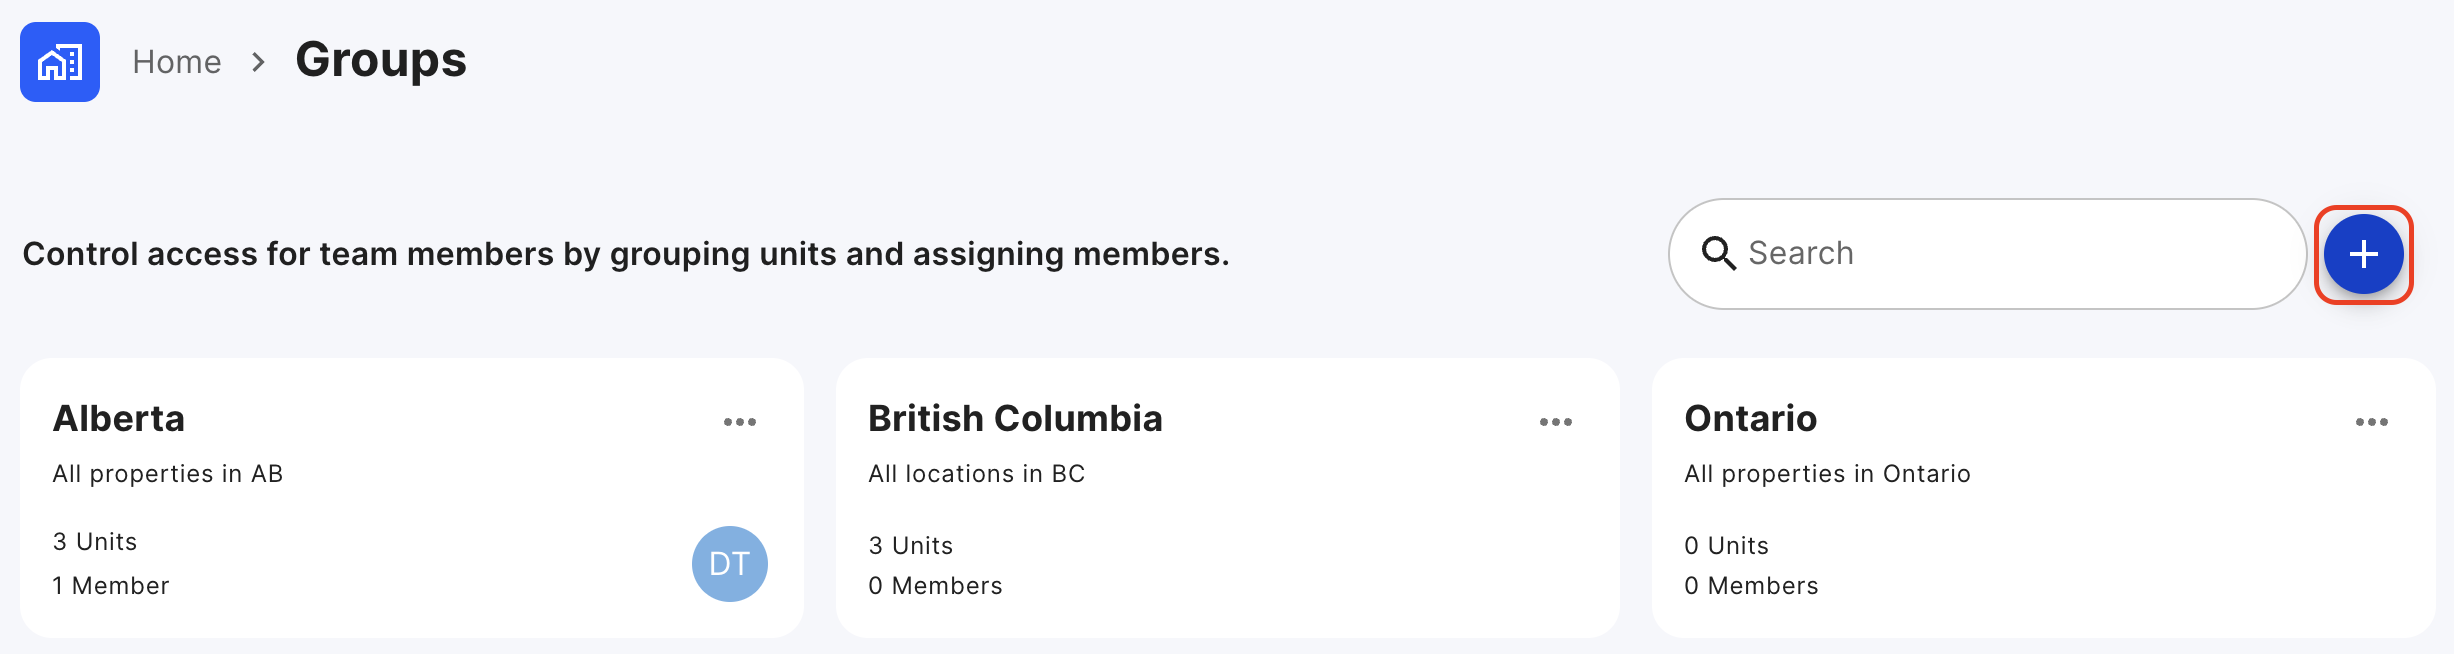
- Click the + icon to start creating a new group.
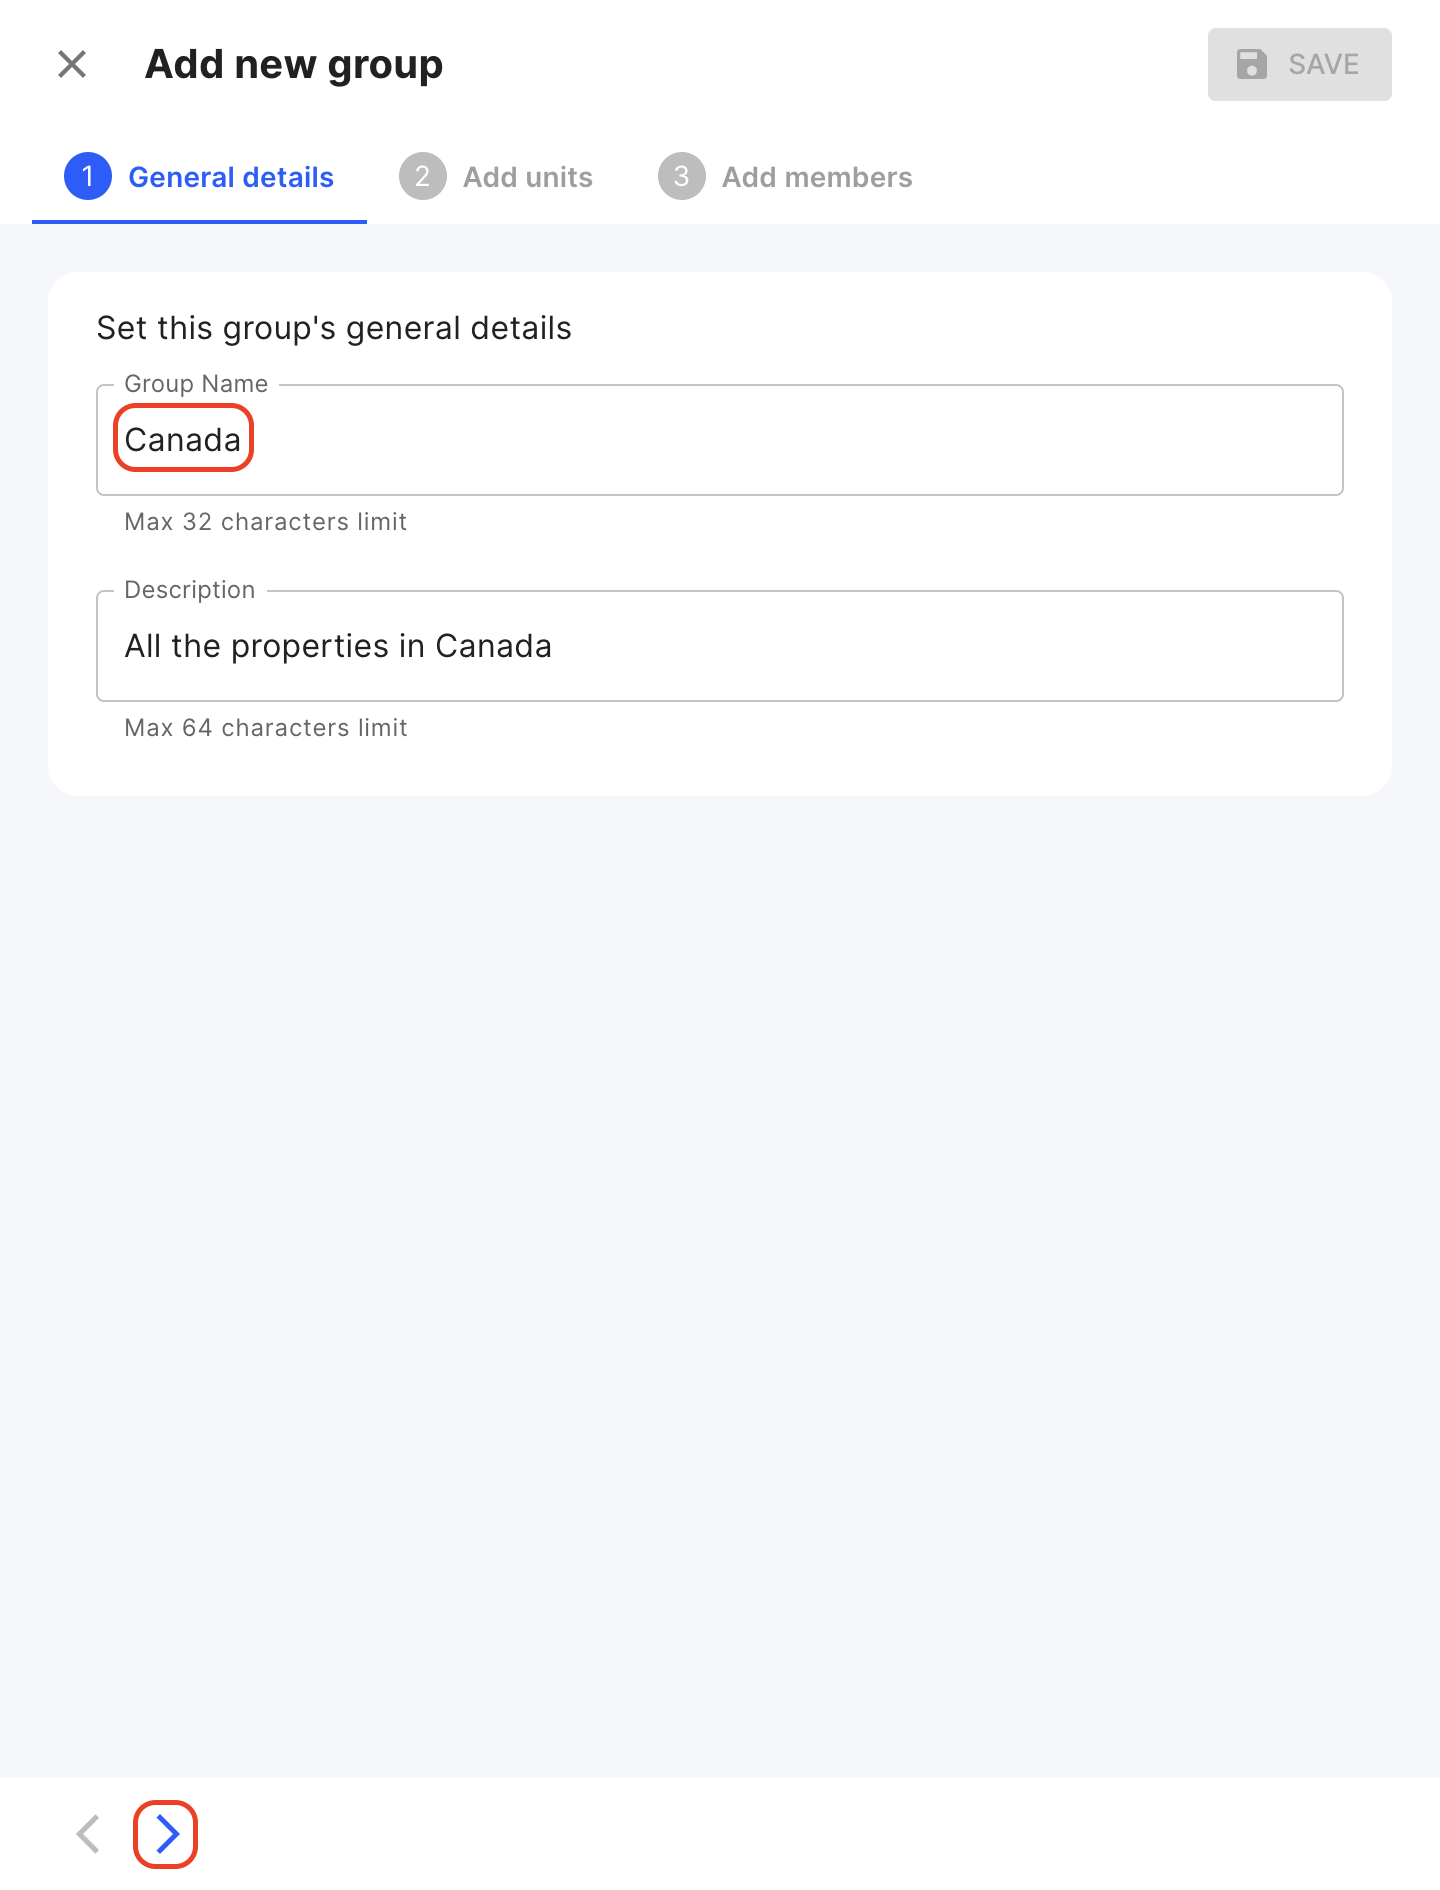
- Enter a group name and description for easy identification.
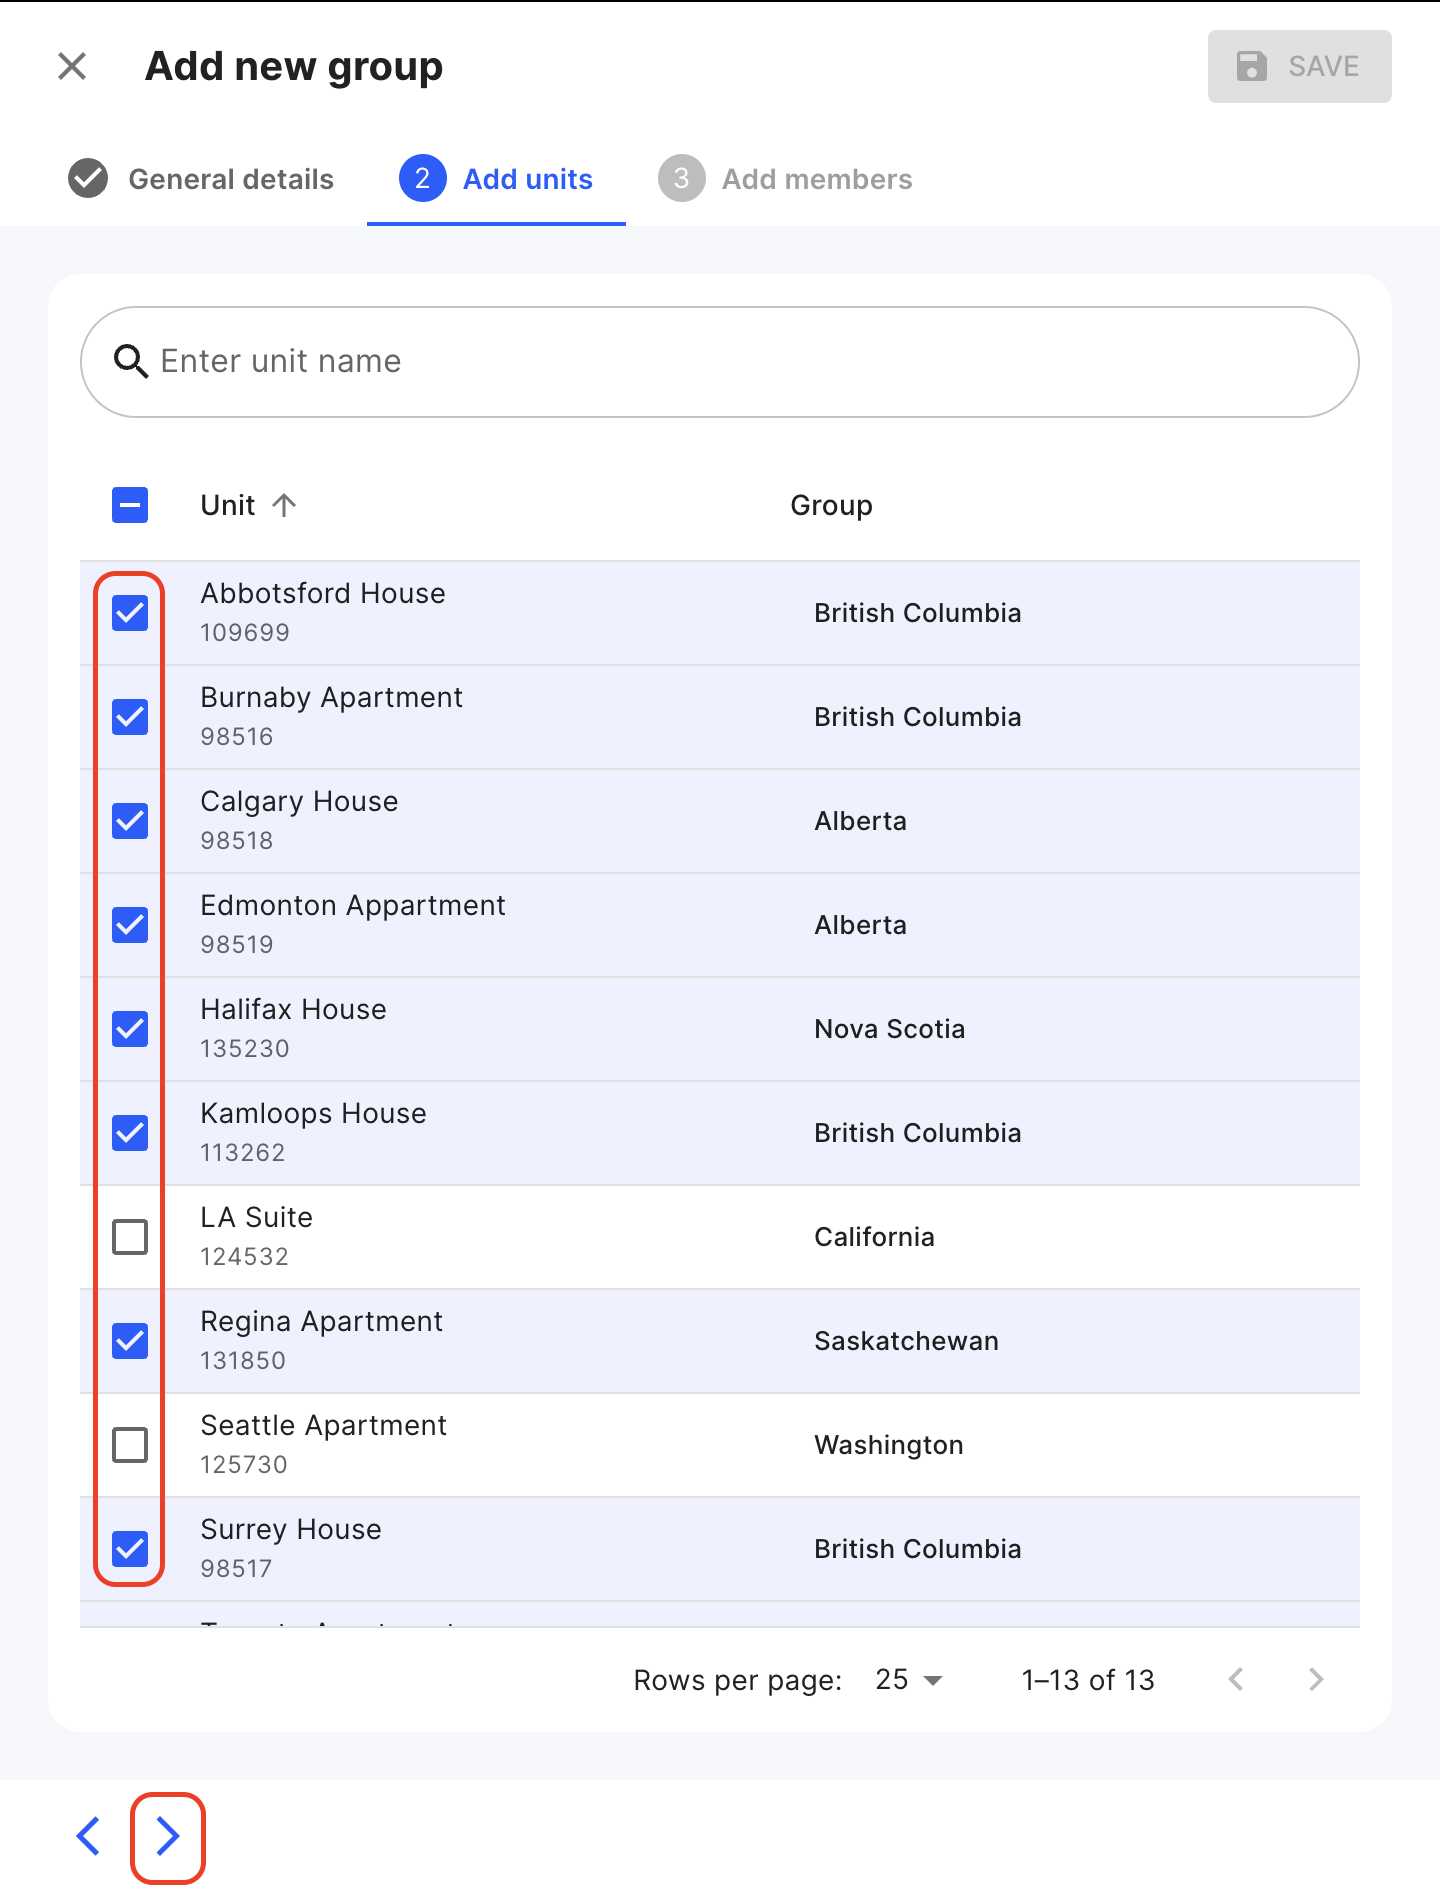
- Select the units belonging to this group.
- Select Members belonging to this group and press Save.
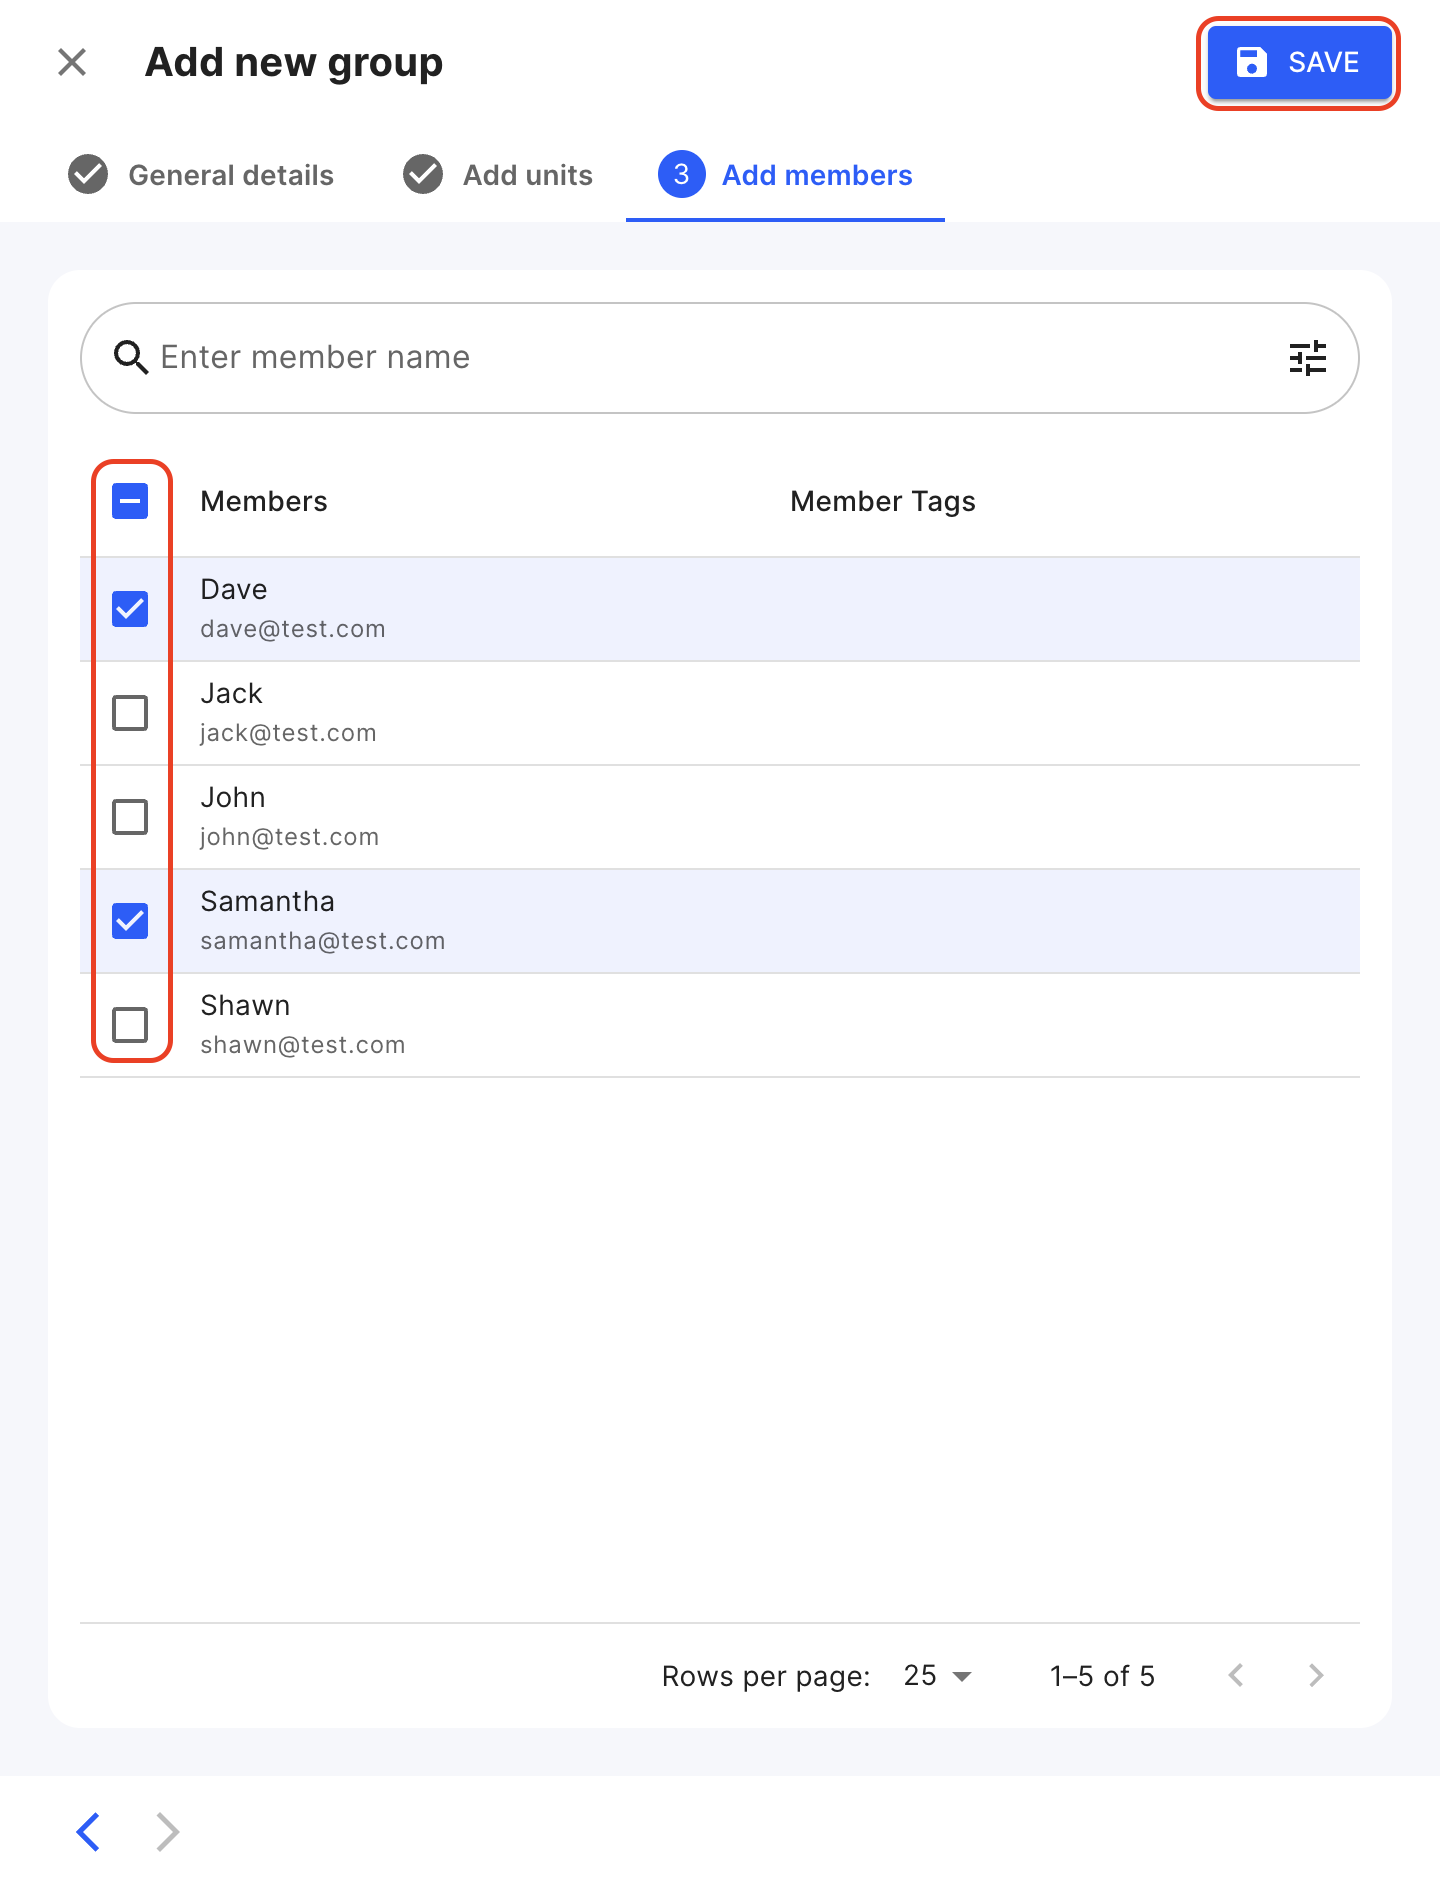
Editing a Group
Add/Remove Units in a Group
- In the Groups tab, click on the 3 dots next to the Group you want to edit and click on View details.
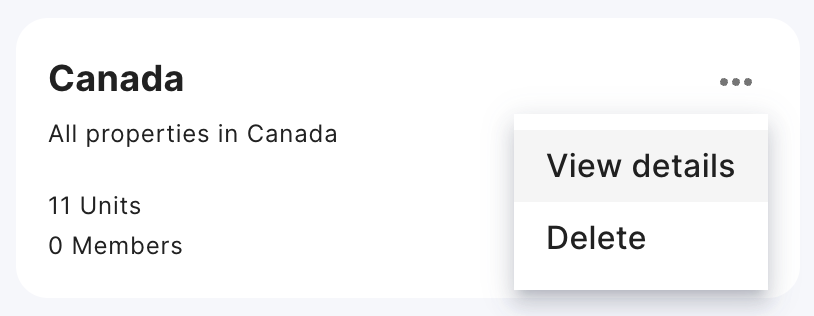
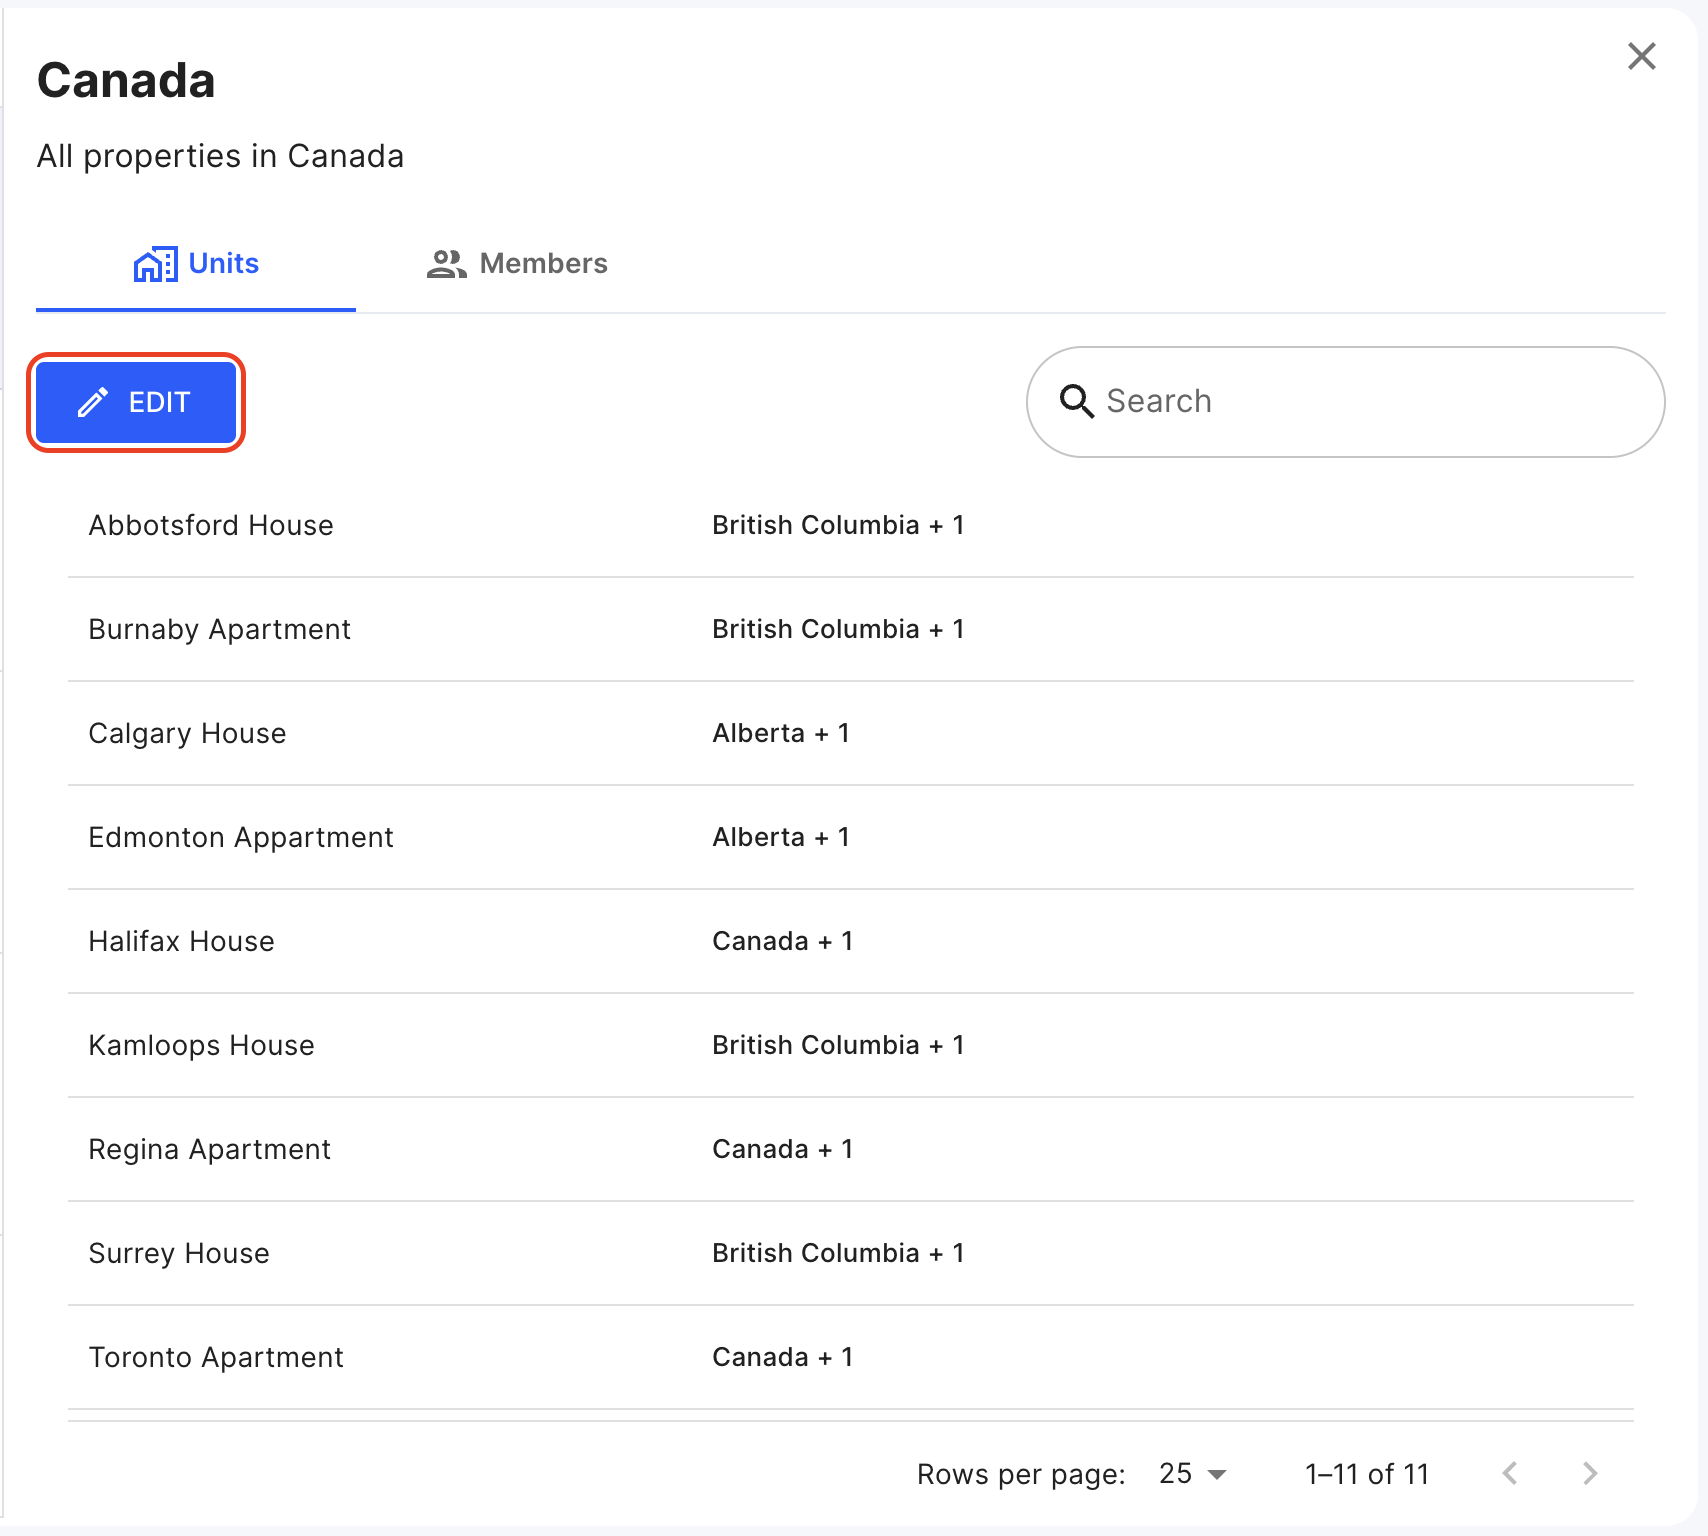
- Click on the Edit button under the Units tab.
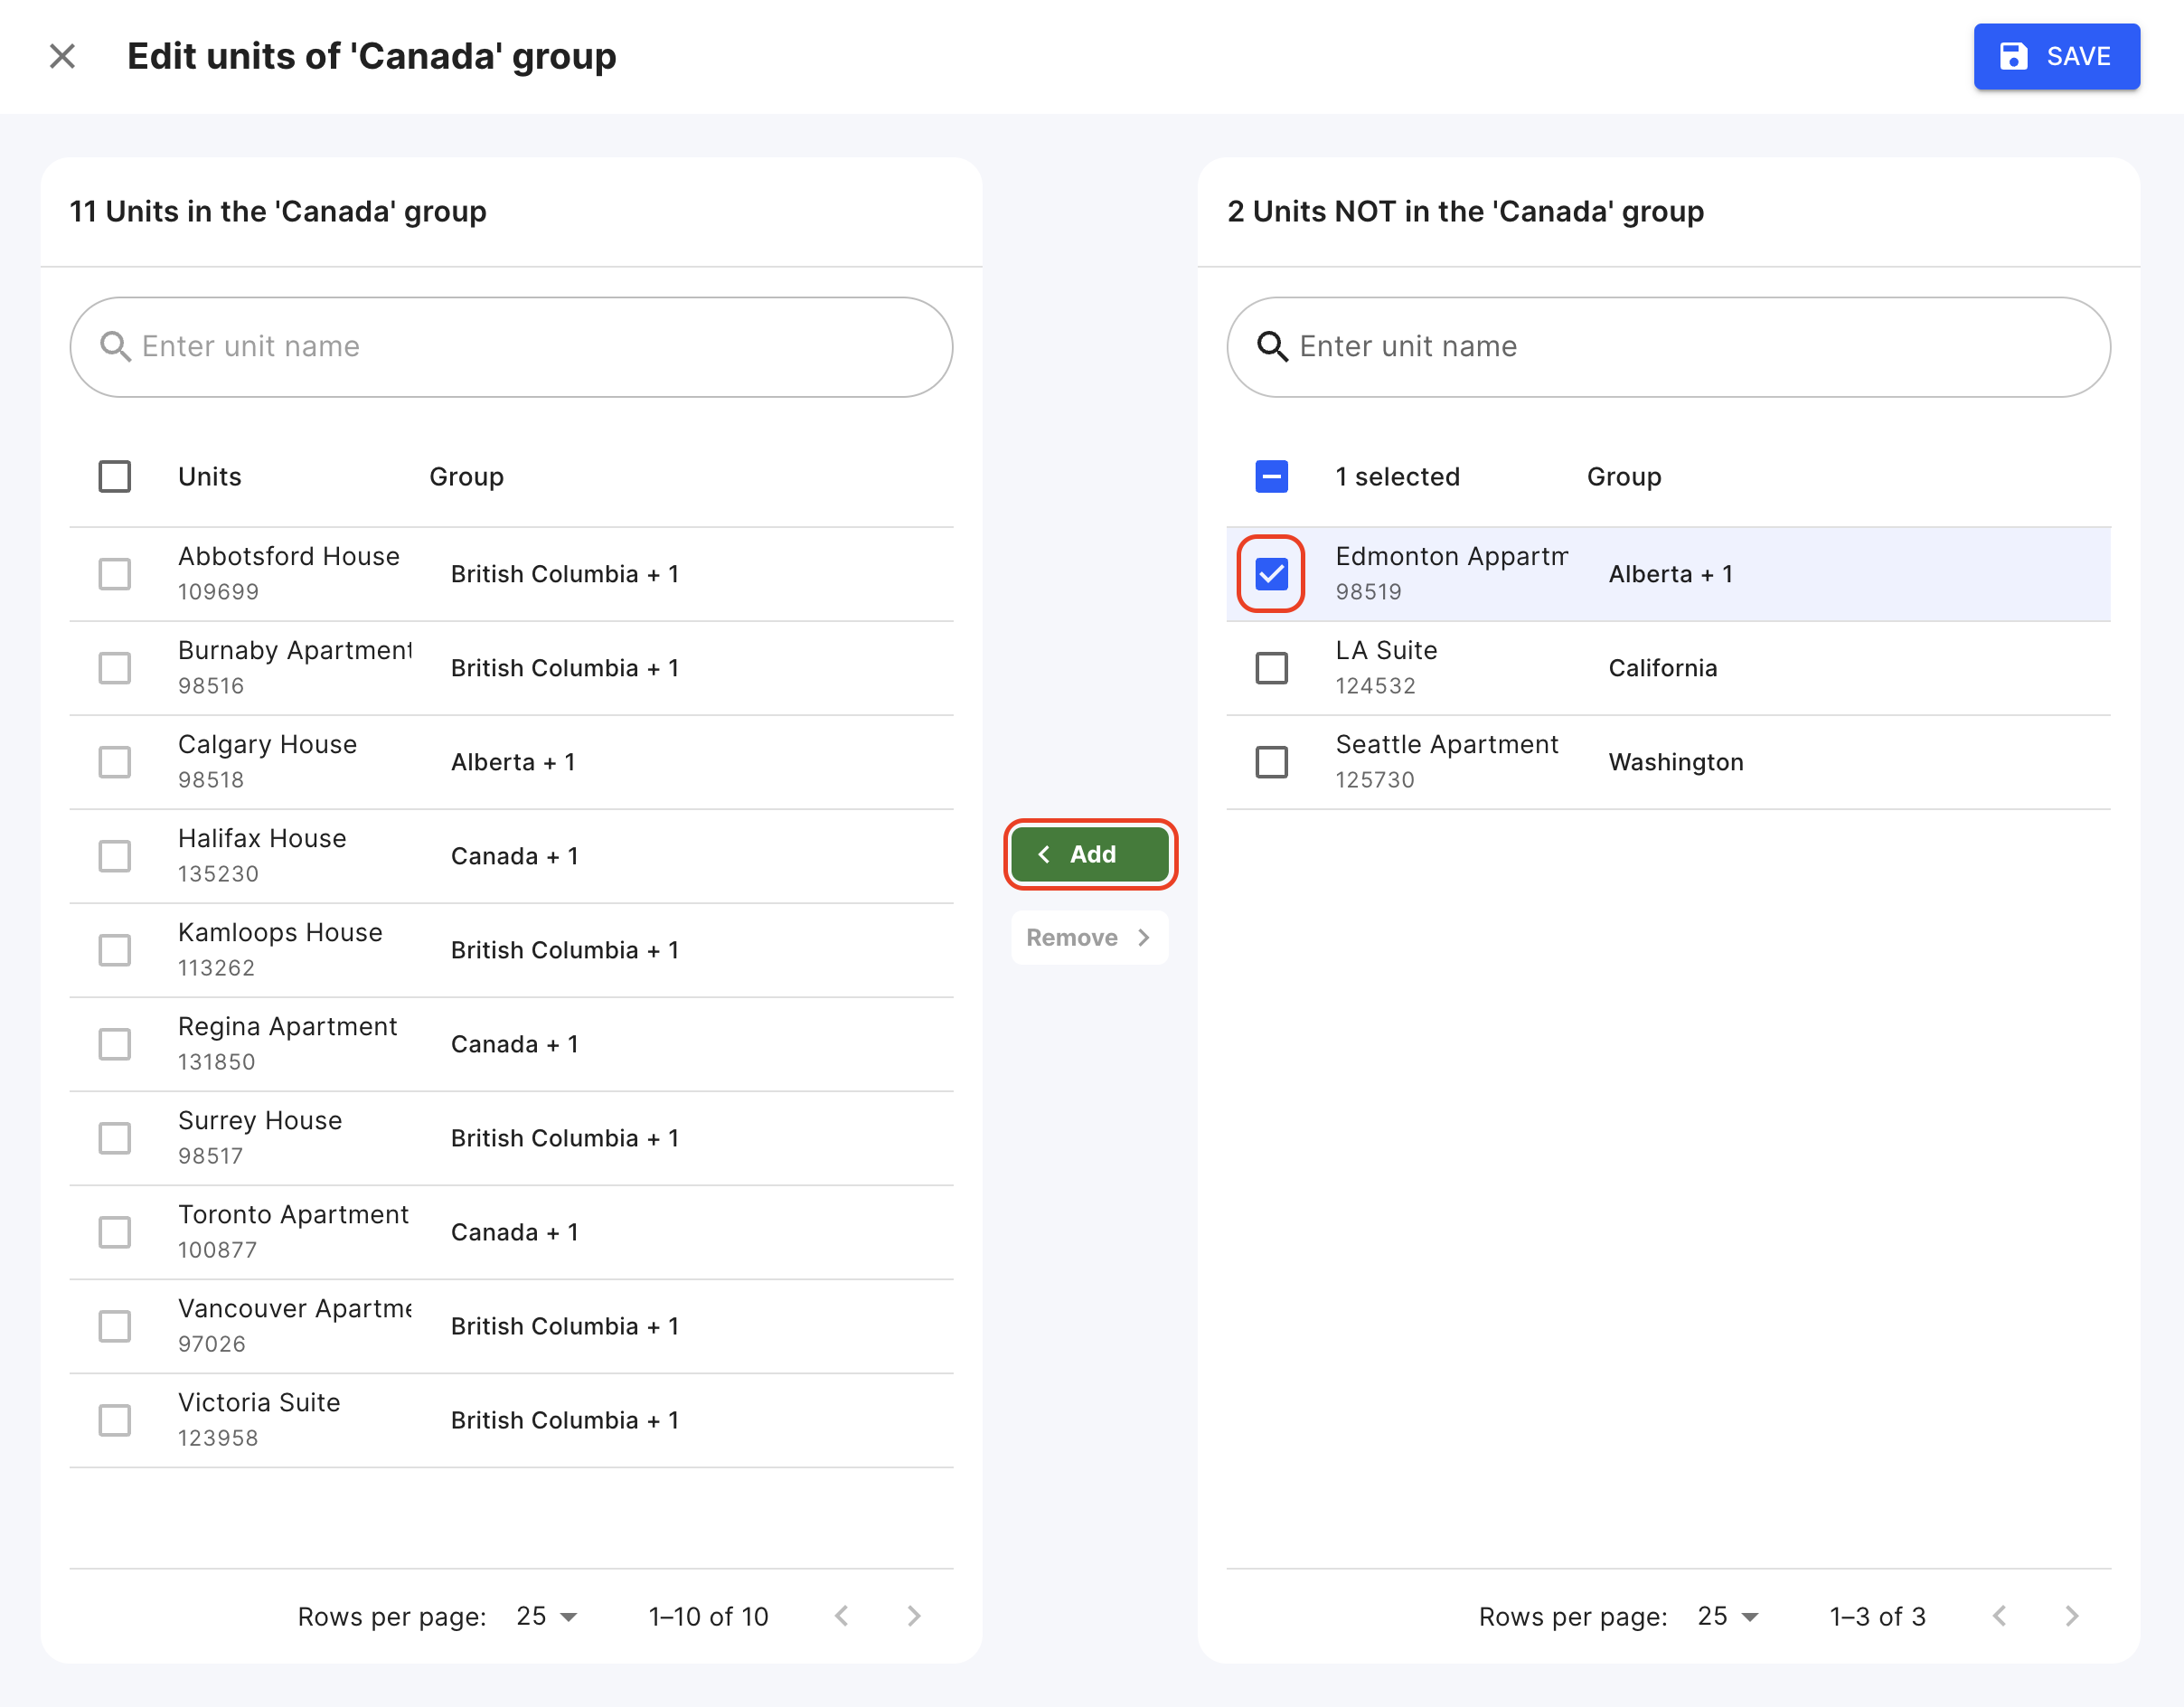
- Select the units you want to add from the right panel and press the Add button to move the units to the group. Use the search function to find specific units.
- Select the units you want to remove from the left panel and press the Remove button to remove the units from the group.
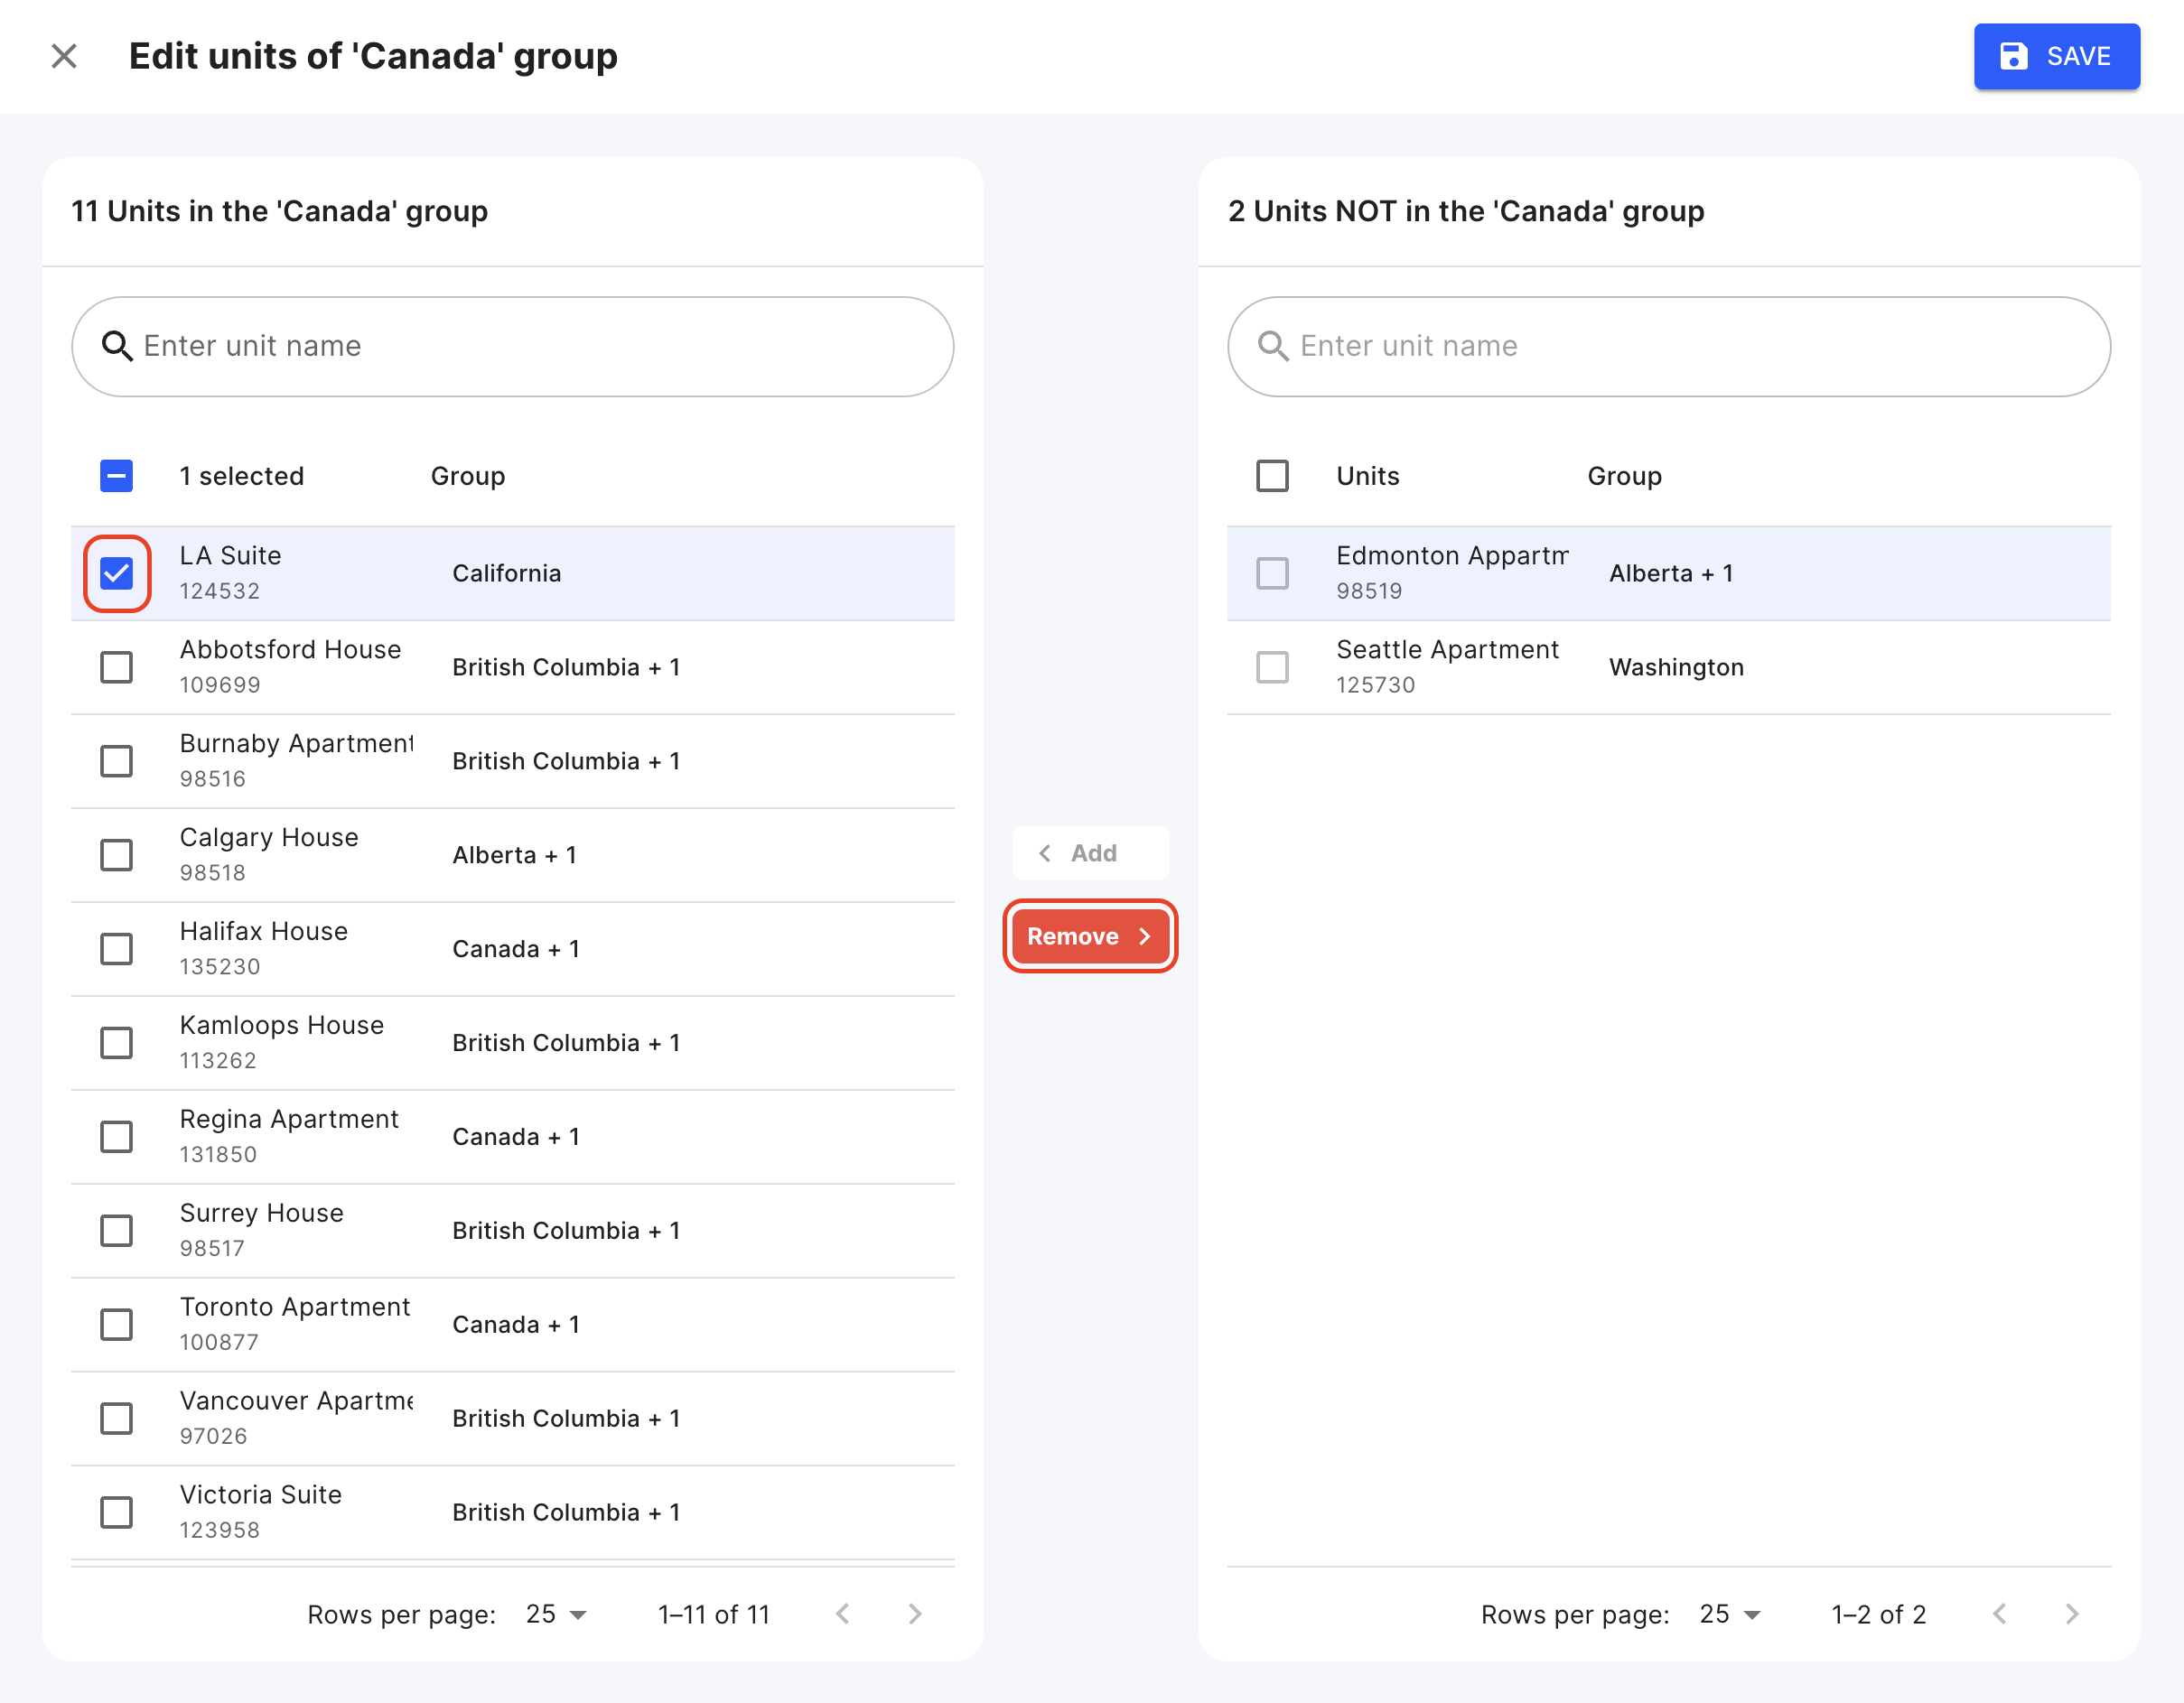
- Press the Save button to apply changes.
Add/Remove Members in a Group
- In the Groups tab, click on the 3 dots next to the Group you want to edit and click on View details.
- Switch to the Members tab and click on the Edit button.
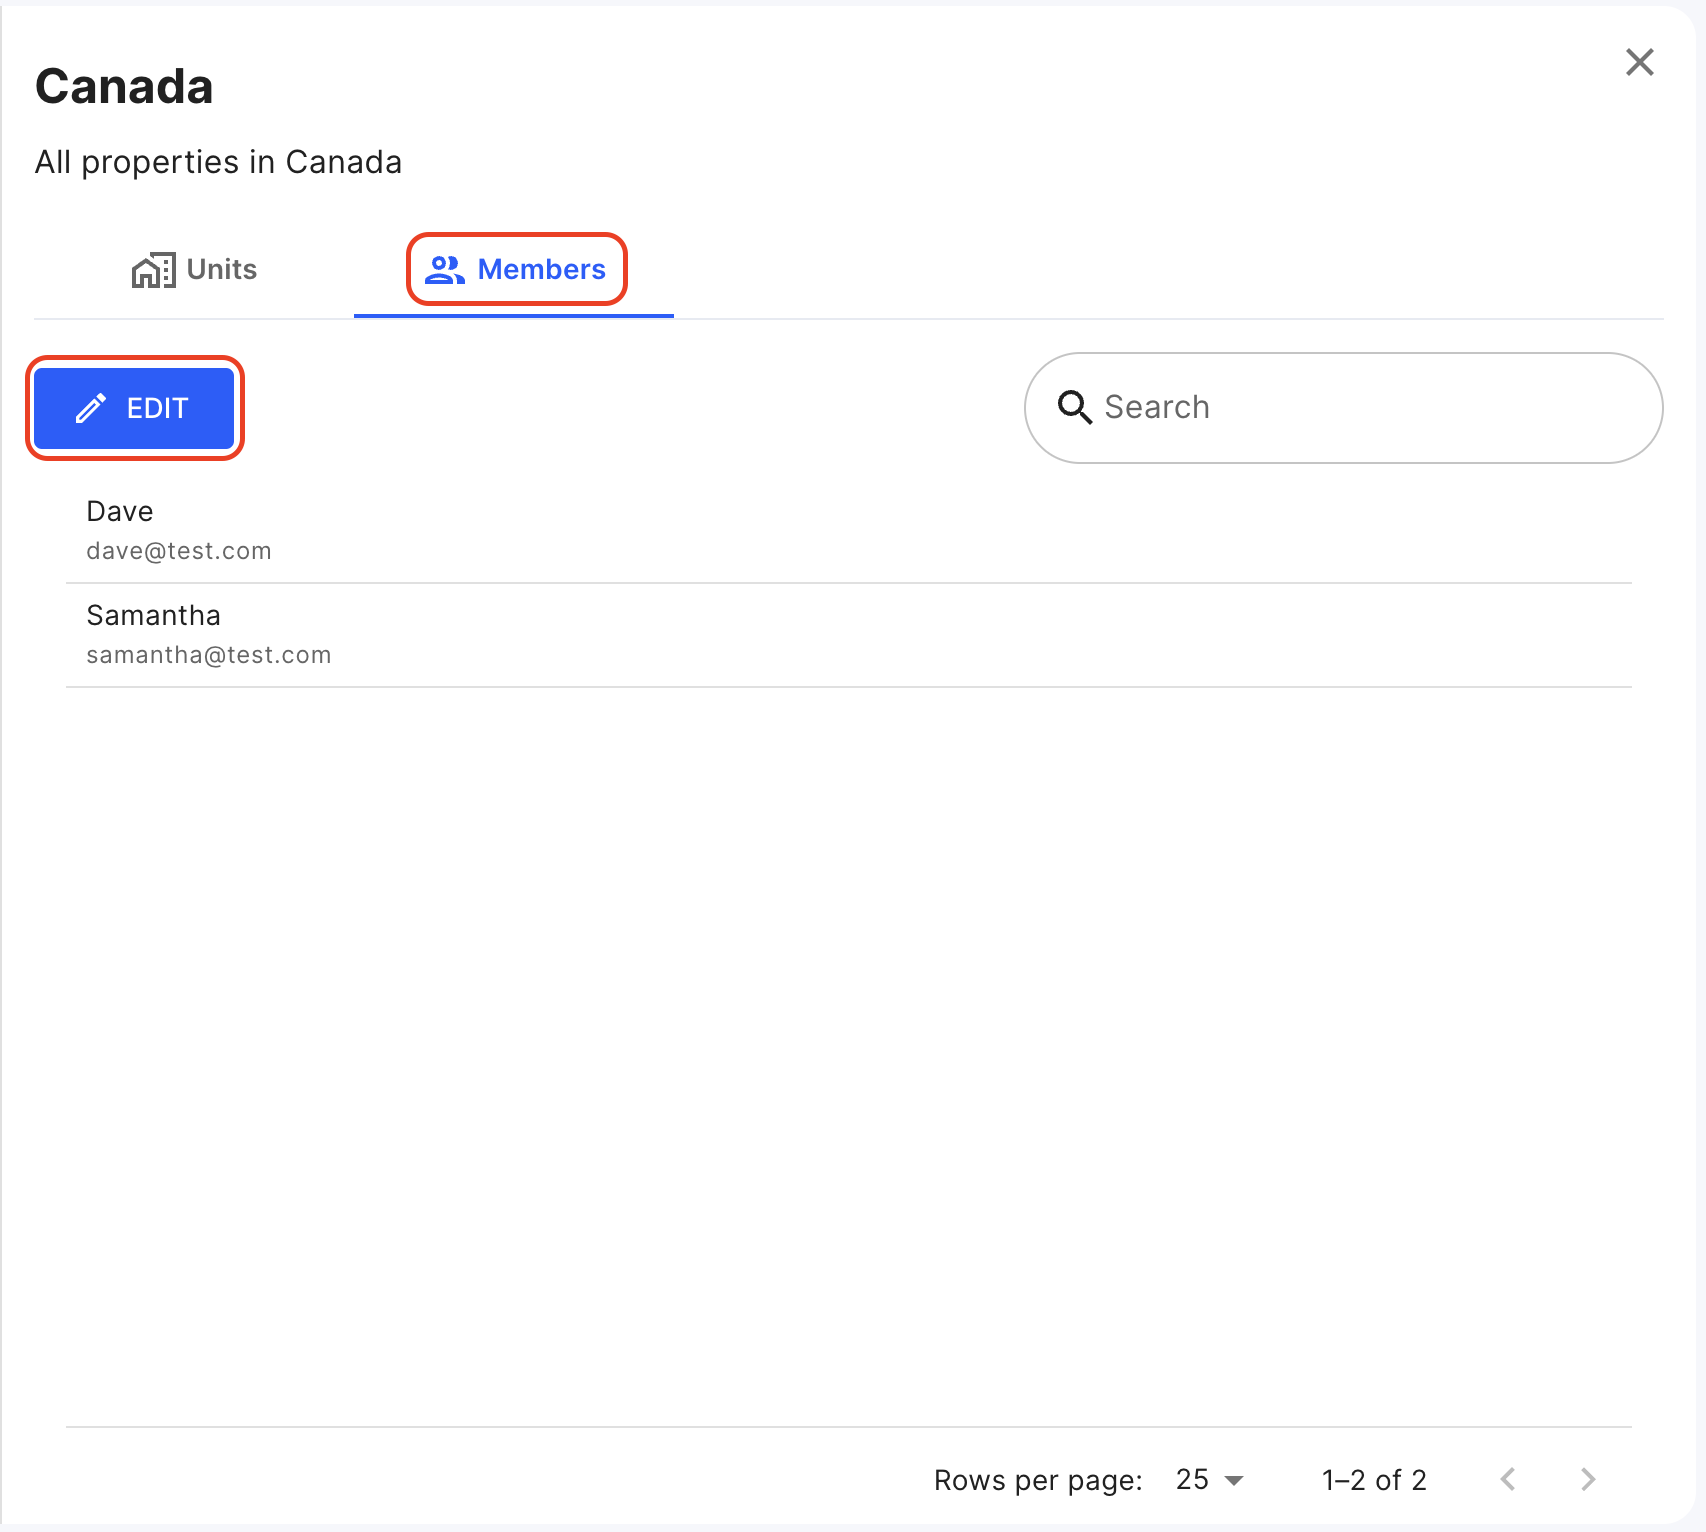
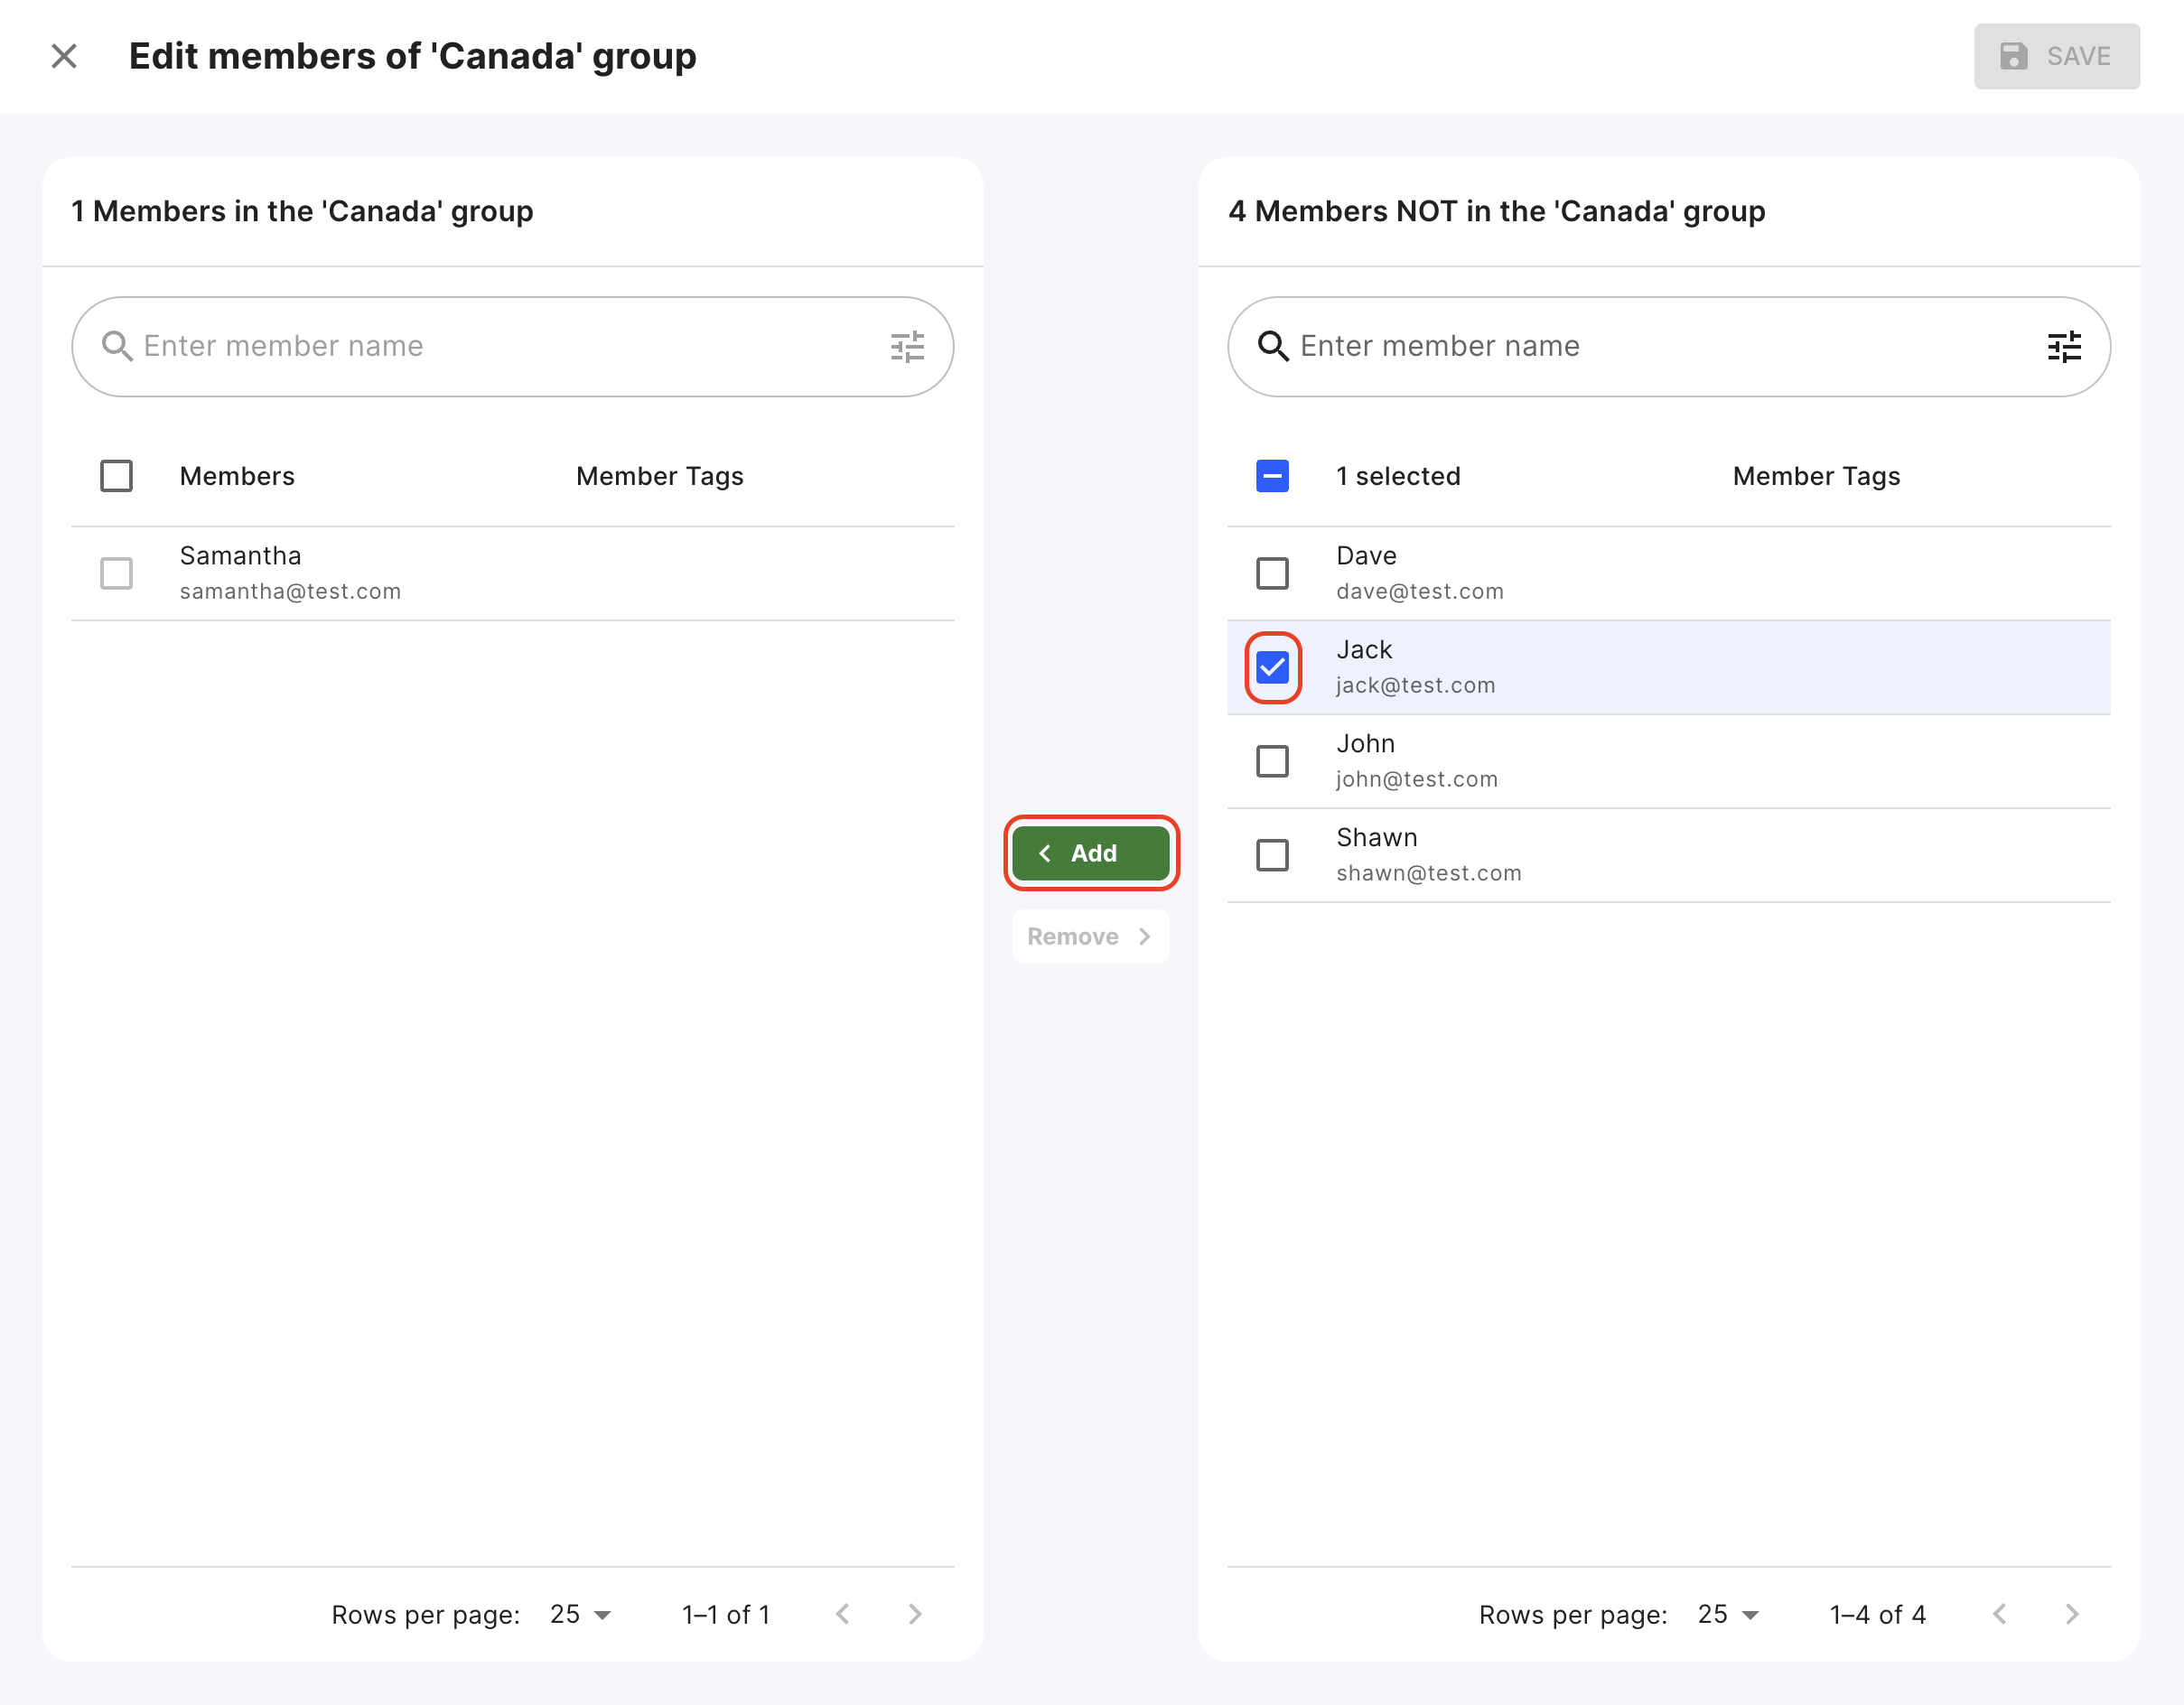
- Select the members you want to add from the right panel and press the Add button to move the members to the group.
- Select the members you want to remove from the left panel and press the Remove button to remove the members from the group.
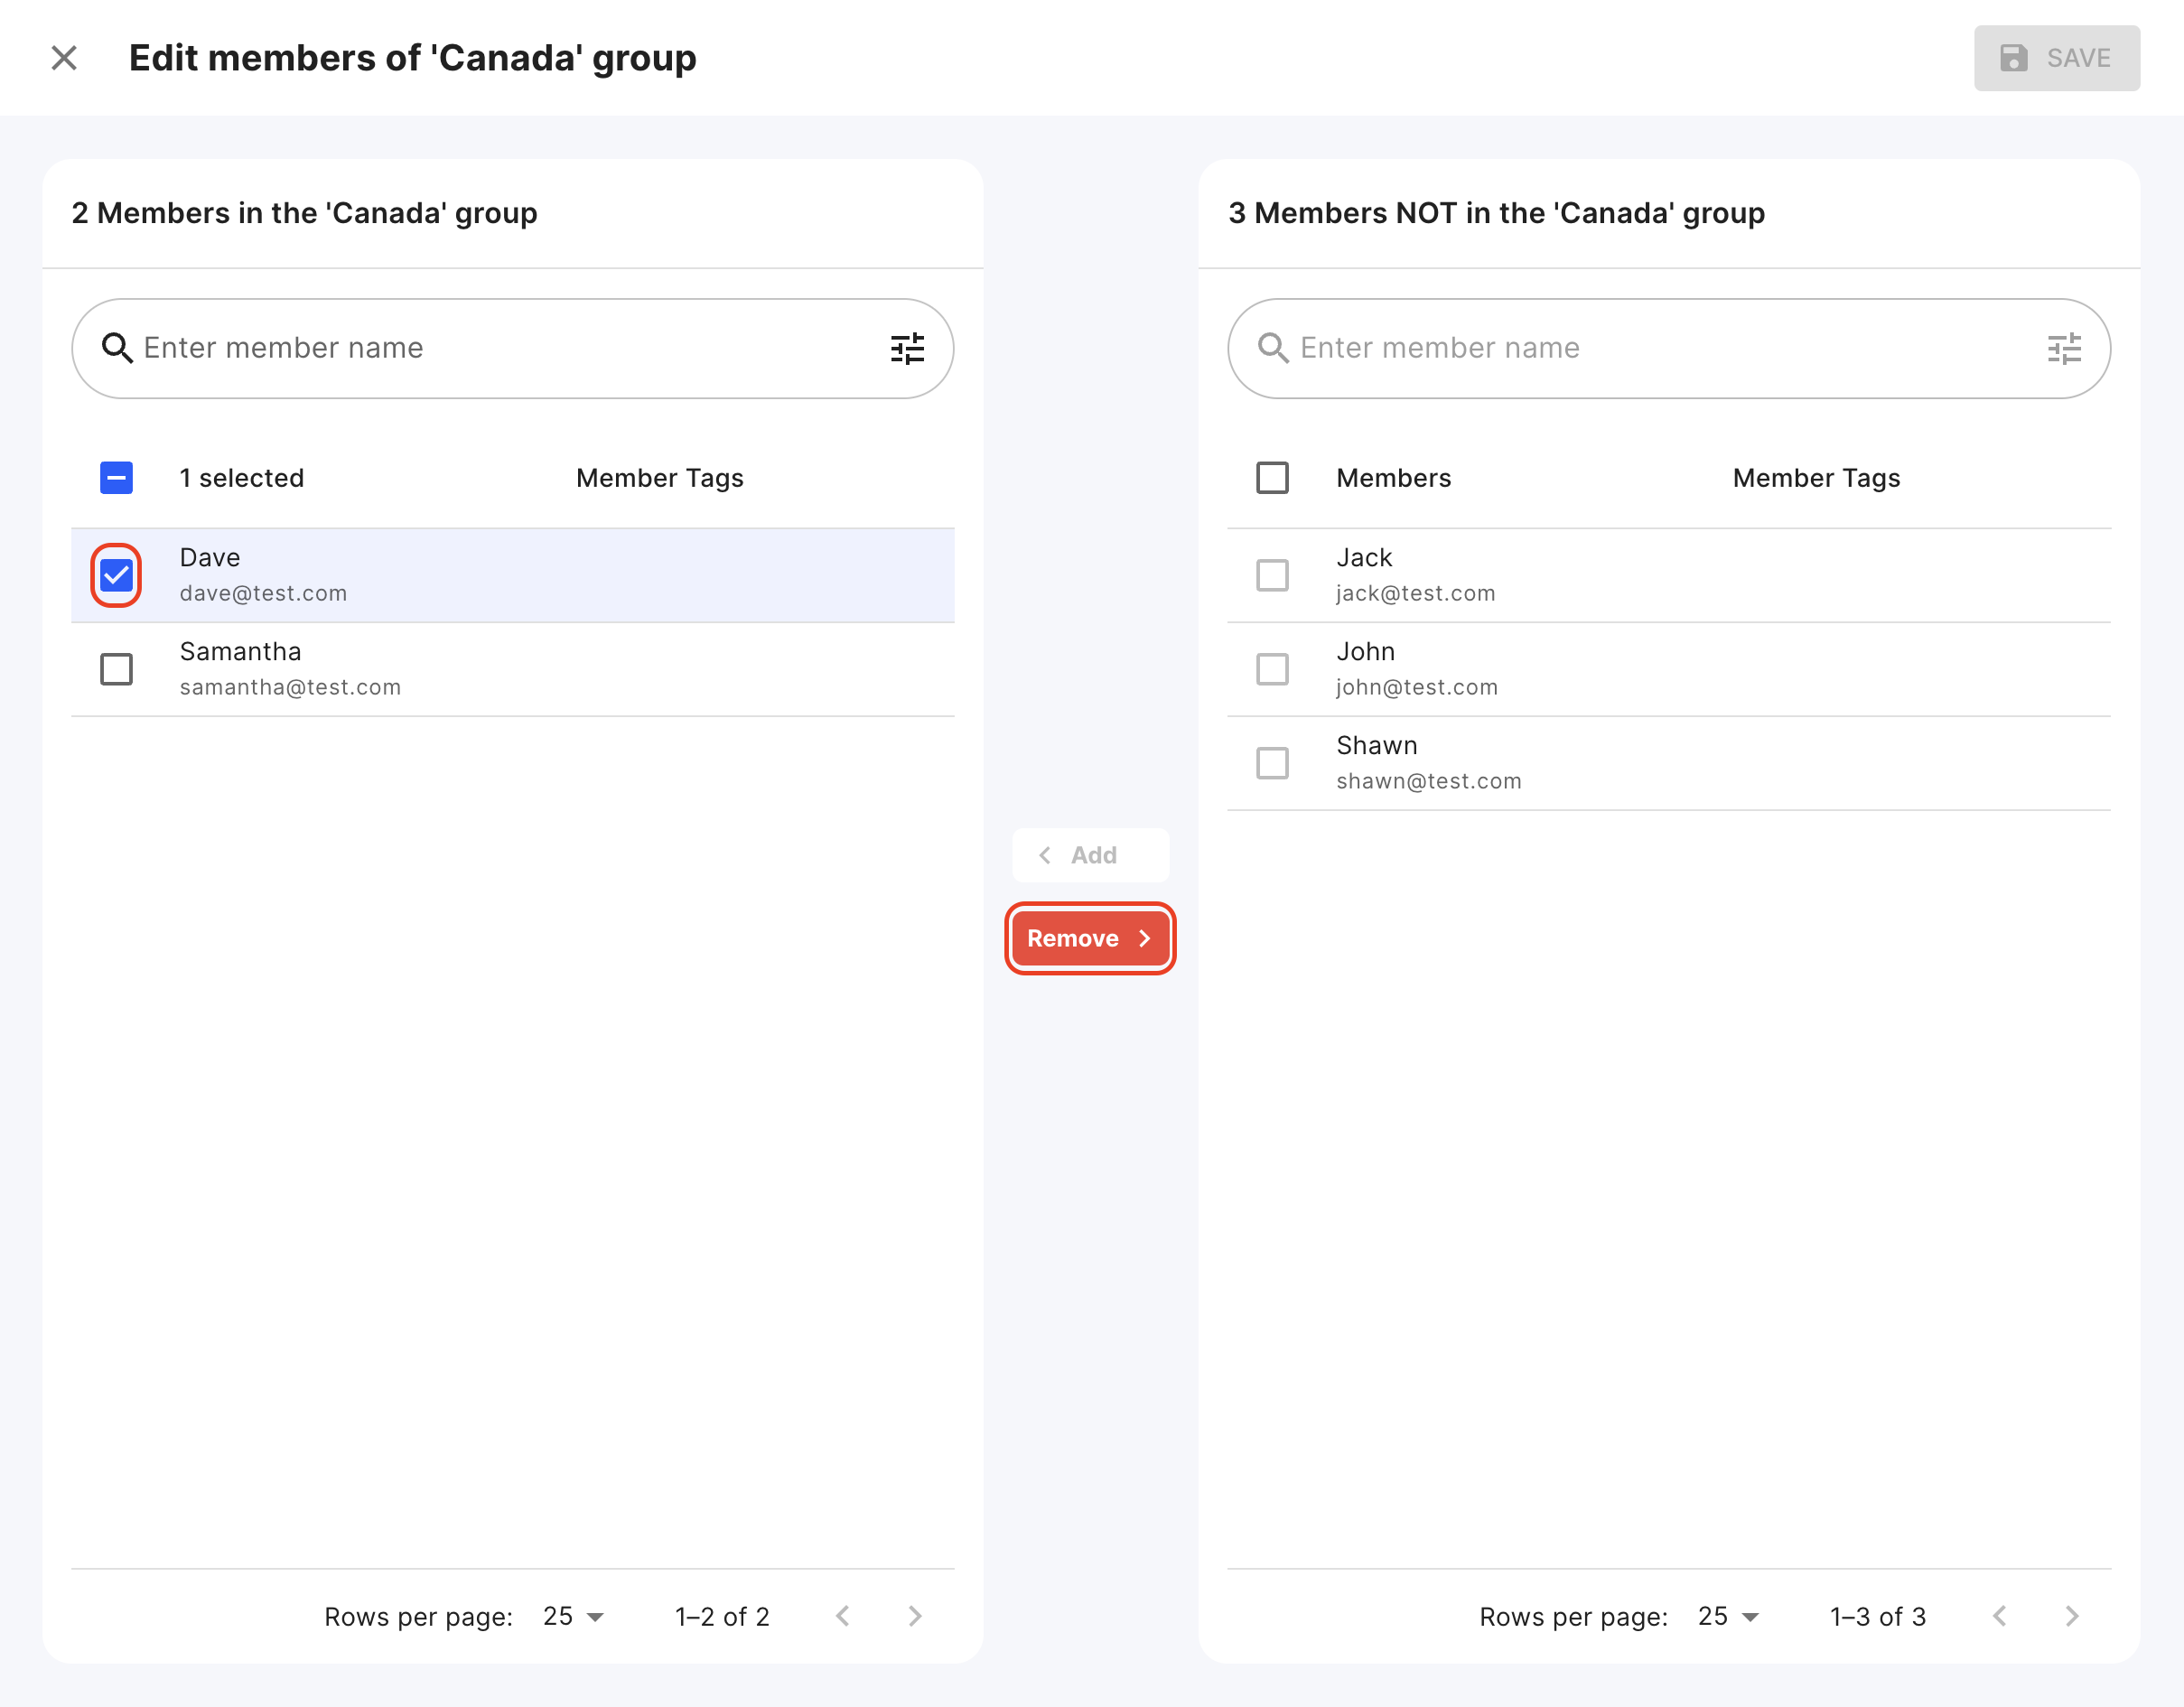
- Press the Save button to apply changes.
Deleting a Group
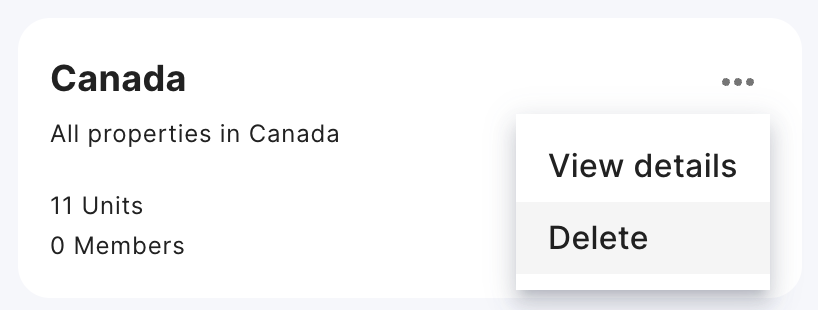
- In the Groups tab, click on the 3 dots next to the Group you want to delete and click on the Delete button.
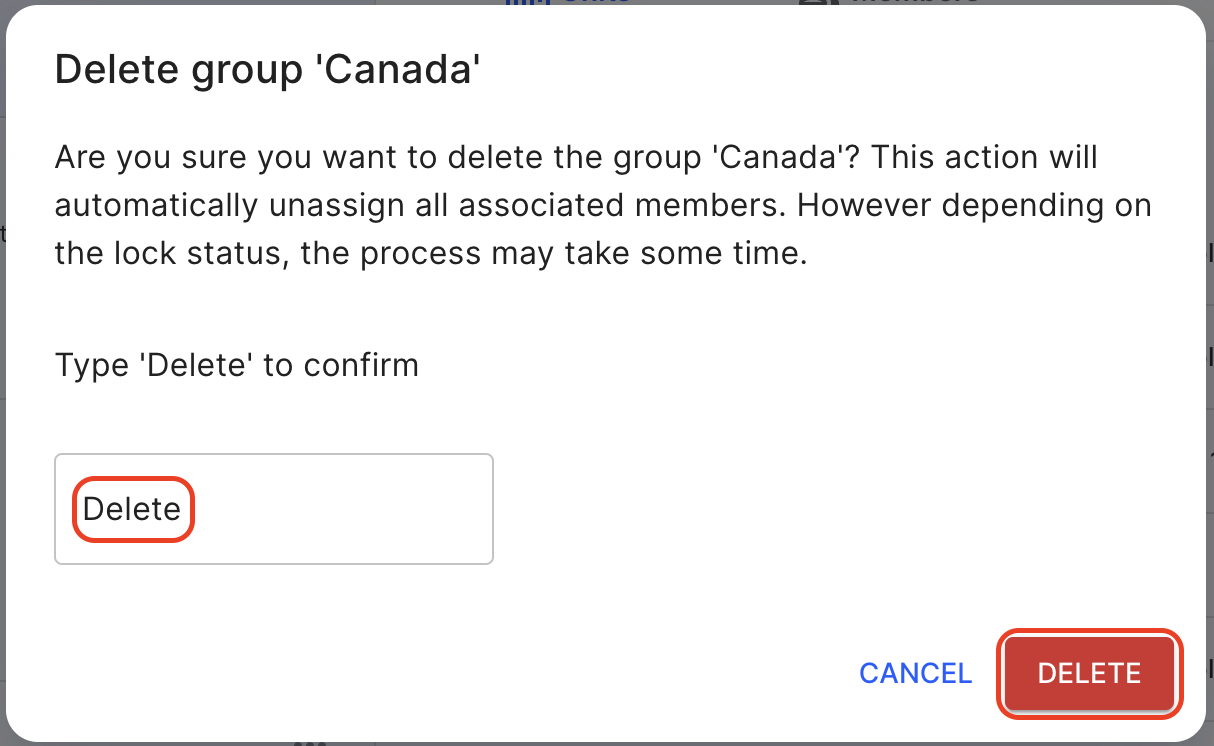
- Type 'Delete' in the text box and then press the Delete button to confirm.
FAQs
- Q: Can I create groups based on different criteria like locations or company departments?
- A: Yes, groups are versatile and can be created based on various criteria such as locations, companies, or specific unit