
Make sure that you have the login credentials that our customer success team sent to you in your onboarding email. If you did not receive these credentials, please contact our customer success team and they will be happy to provide you with these.
Account Setup
- Download the 'Healthy Home Coach' app from Google Play or the App store on your phone or tablet. It is the one with a leaf logo like this:

- Log in to the app using the credentials that our customer success team sent to you in your onboarding email
If you did not receive these credentials, please contact our customer success team support@operto.com and they will be happy to provide you with these. - Proceed to the device setup instructions
Device Setup
- For the first time setup, you will be taken to the Setup screen.
If you already have a device setup, go to Settings on the top left and then select Install new Smart Indoor Air Quality Monitor which will take you to the Setup screen - Select Set up a new installation
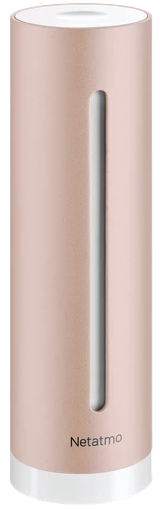
- Make sure your device is plugged in and it is slowly glowing pinkish white. If not, touch the top surface until it turns pinkish-white.
- Go through the setup flow in the app.
- Allow Home Coach to find and connect to devices on the local network
- Wait for the device to be found. Sometimes, it takes a few tries to find the device.
- Accessory setup:
- Name the accessory with this naming convention: propertyname_unitnumber.
- Make sure your 2.4 GHz wifi network is selected, if not select Show Other Networks and find your 2.4 GHz wifi network
- Click Next
*If the message “an unexpected error occurred, try again” appears, click cancel and repeat steps 2-3, if after multiple attempts the device still does not connect, refer to the reset process, and if the error persists, try using another phone/device*
- Continue the setup flow
- If you are asked: Is this product being installed for the first time? Select Yes
- It will tell you that a Smart Indoor Air Quality Monitor is ready to be configured with HomeKit, if you own multiple devices you may choose to identify and name the devices according to rooms. ** Click ‘Next’ to continue the setup flow
- Homes: Create a new Home for each of your new properties and name it with the same naming convention: propertyname unitnumber (E.g. Seaside Hotel 101)
- Rooms: Create a new room for each device and continue naming it with a similar naming convention: propertyname unitnumber roomname (E.g. Seaside Hotel 101 Kitchen)
- Pairing: Enter the 8-digit pairing code or Scan the code on the device located on the back of the device to connect app with accessory
- Configure HomeKit: select next
- It will then ask you to choose your profile, select 'Whole Family'
- Go to Add New Service in your Manager Portal and request to add a Noise Monitoring service and complete the form.
- You are done! Someone from the Customer Success team will reach out to you once the device is onboarded on Operto.
Final Step: Ensure you have turned off all notifications in your Netatmo app on your phone so that they don't interfere with the Operto notifications.
FAQs:
What does each colour on the sensor light mean?
When you touch the product, the LED will glow one time with the Home Health Index colour:
- Blue means the room comfort level is Healthy;
- Green means the room comfort level is Good;
- Yellow means the room comfort level is Fair;
- Orange means the room comfort level is Poor;
- Red means the room's comfort level is Unhealthy.
How can I reset my device?
To reset the device, you will need to touch the top surface for 20 to 25 seconds until the light on the device starts to flash red.
Step 1. If you continue touching the product for about 7 seconds, the Health Index will light up, and then glow in white. The product is then ready for configuration.
Step 2. If you continue touching the product for 12 seconds, the product will blink red. It will then be ready for a factory reset. To confirm the reset press one more time: the red light will become still.
Step 3. Then wait until the reset is done: the blue led blinks (or touch the module again). Reinitialize the application to restart the set-up procedure.
Steps 4. The device will begin to flash white once it has fully reset. At this point, it is ready to be paired again.
- If you would like to rename your device, you can do so by going into the Advanced Settings and clicking on the device's name. You can now choose a new name for the device.
What is the best location to place my device?
It is critical to determine an ideal location for the device. Choosing the right location will greatly improve accuracy and reliability. Important factors to consider are:
The device is placed in a temperature neutral spot within the unit.
- Avoid placing the device on window sills or next to heat sources.
The device is placed in a central area of the unit.
- Avoid placing it inside closets or cupboards.
The device is placed away from loud noise sources.
- Avoid placing it directly next to speakers.
The device is placed in an inconspicuous spot.
- Avoid placing it near a spot where it is highly visible or likely to be unplugged by guests.
The device is plugged into an outlet that is not connected to a light switch that a guest could potentially turn on and off.
A few ideas on where to place the device:
- Behind the couch in the living room
- On top of the refrigerator
- On the lower portion of the TV stand next to the cable box
My guests keep unplugging the device, what should I do?
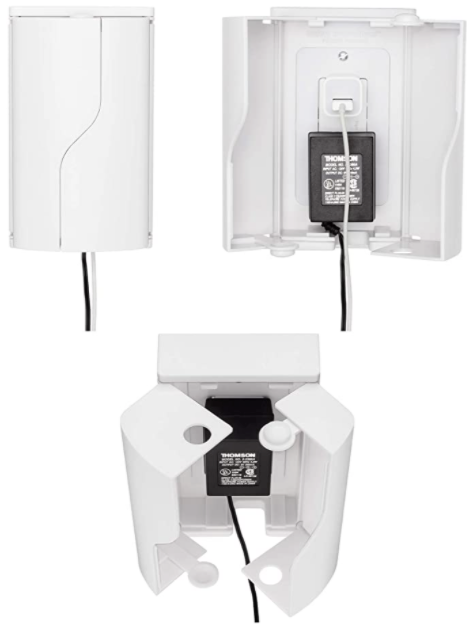
Please note, sometimes guests or their kids may accidentally unplug the device. We suggest for you to print a label "Please do not unplug" to stick on the device. Also, you can consider protecting the device with a basic outlet cover to avoid it from being unplugged.
Example outlet cover: